Sunday, November 27, 2011

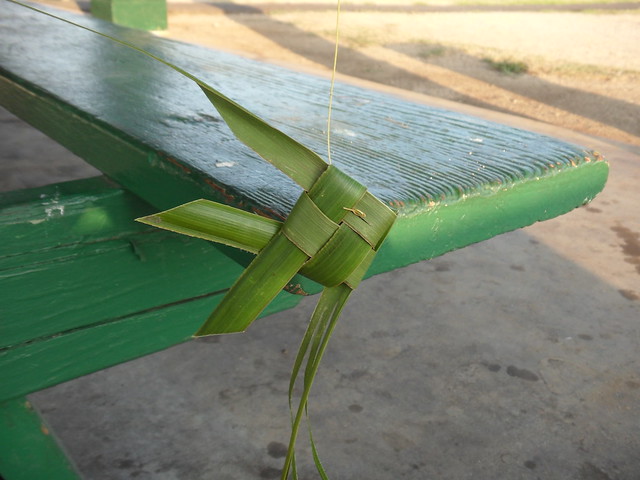
Easy way to folding fish (palm leaves and paper)

photo

Easy way to folding fish (palm leaves and paper)

Palm Leaf Fishes

photo
Palm frond art
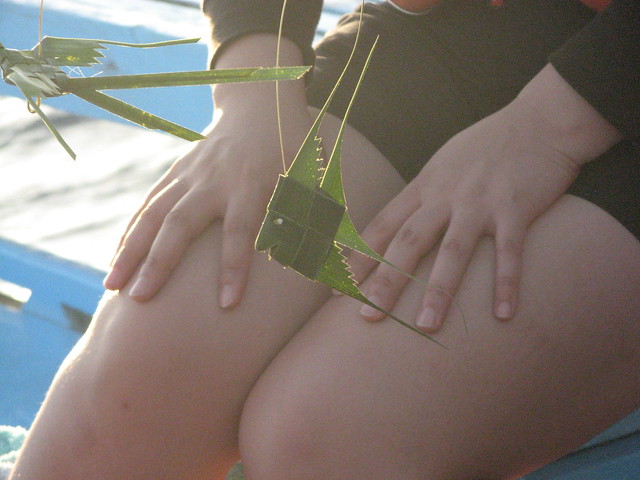
While riding in a boat tour around the cultural center, Mary learned how to make this fish from a palm frond.
Things You Need:
1.   Piece of palm leaf
2.   Scissors
3.   Ruler
4.   Small knife
Tutorial
1. Take a piece of palm leaf.
2. Use the small knife or your thumb fingernail and insert it at the base of the stalk.
3. Run the knife or fingernail down the base of the stalk, all the way to the tail end of the palm. 
4. Pull off the stalk and save it for later use.
5. Take the two pieces, (still intact at the widest end) measure one inch from the widest end and cut.
6. Take the two cut pieces and even the up.
7. Take the ruler and measure 14 inches from the cut end.
8. Take the scissors and cut at the 14 inch mark.
9. You now have two even pieces of leaf to make your pinwheel.
10. Take the two even pieces of palm and make a cross.
11. Use the left thumb and first finger to hold the pieces together in the center.
12. Bend the top end of the vertical piece towards the center, and hold it with your thumb in place. 
13. Repeat the same process with the bottom vertical piece.
14. Hold the pieces of palm with your left fingers and use your right thumb and first finger to bend and insert the right horizontal end into the top loop.
15. Repeat the same process with the left piece and bottom loop.
16. Use the right thumb, slowly release and slip the end of the bottom loop into the right loop
17. Repeat the same process for the left side.
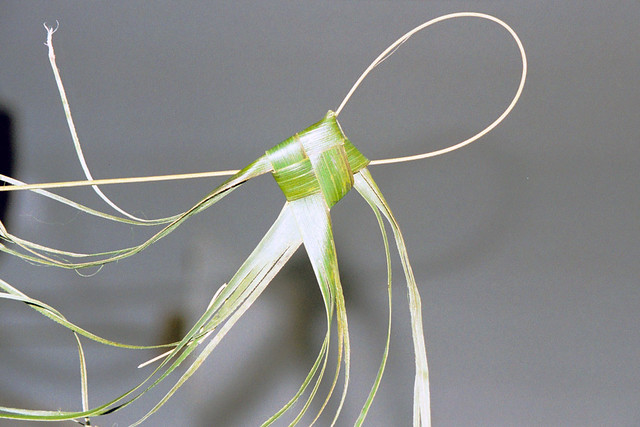
18. Use all your fingers to pull and hold the four ends, while forming the pinwheel.
 19. Folding the pinwheel wing at the right bottom  parallel to the diagonal.

20. Using the the pinwheel wing at the right top, folding over the pinwell wing that  parallel to the diagonal and threaded down the diagonal.
21. Using scissor to cut fins for the fish
To make paper fish you can make with the same way.
photo
Palm Fish
photo


Photo: http://flick.com
Wednesday, November 16, 2011

Crochet patterns, Beautiful tableclothes

Crochet patterns, Beautiful tableclothes
photo

Ice Cream Cone Doily by Joyce Bragg

photo

Rose Garden Doily by Kathryn White
d=26 cm Hook 1.25
photo

Vintage Charm Antique Doily by Carol Alexander
d=18cm Hook #1.00
photo
Ring of Love Doily by Diane Stone Ring of Love Doily by Diane Stone
d=20,5 cm Hook 1.25/ 1.00

photo

Ice Cream Cone Doily by Joyce Bragg
d=16 cm Hook 1.0 mm
photo

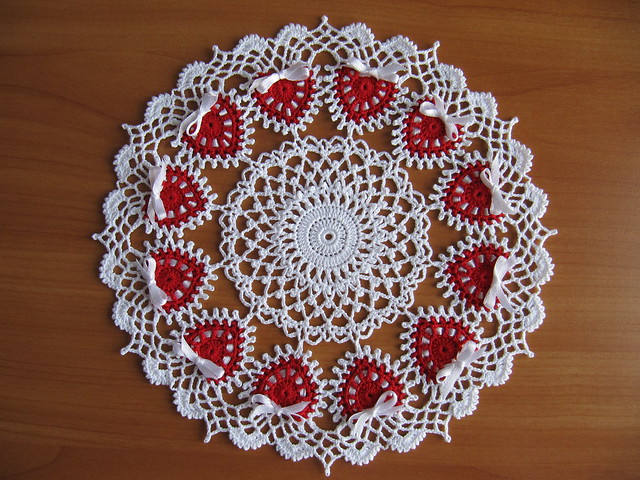
Tiny Hearts Doily by Diane Stone
d=19 cm Hook 1.00
photo

Pineapple Whirl by Elizabeth Hiddleson
photo

Double Pineapple Doily by American Thread Company
d=40 cm Hook № 1
photo

Rustic & Irish Rose Table center
d=23cm Hook № 1
photo

Gothic Lace Doily by Elizabeth Ann White
Gothic Lace Doily by Elizabeth Ann White (BellaCrochet)
d=29 см
Source: http://www.flickr.com/photos/nik_oc


Crochet patterns, Beautiful tableclothes

Monday, November 14, 2011

Hoppin' Hat tutorial: free knitting pattern


Hoppin' Hat tutorial: free knitting pattern


I used size 10 needles and worsted weight yarn. Cast on 52 stiches. Work in a 2x2 rib pattern for about an inch. Then switch to pink yarn. Knit only in the round for about an inch and a quarter in the pink. Switch back to gray for the next inch. Then switch to blue and knit for an inch and a quarter.


Now here is the trickiest part of this whole hat. take half your stitches and put them onto a spare needles or a scrap of yarn. Then you join the first set of stitches into a round. Switch into the gray yarn and knit about 5 rounds. Switch to your dark pink and knit for five rows. Switch back to gray and knit about five rows. Then switch back to green. Here I just knit until I felt like the ears were long enough. Then I decreased as following:

- *knit 3 k2tg* till last set of 5 stitches. this one I knit one then k2tg twice
- knit a round
- *k2, k2tg* till end of round
- knit a round
- *k1, k2tg* till end of round
Take remaining stitches and tie them off.

Then do the other ear in the exact manner.


Source: http://krafty-katie.blogspot.com/2011/05/hoppin-hat.html

Sunday, November 13, 2011

Crafty jewelry: Granny Square Necklace tutorial

 
Crafty jewelry: Granny Square Necklace tutorial


I love that shop...
And so I decided to create a granny square necklace in black and white.

Materials Needed:
White and black crochet thread [size 3]
Crochet needle [size G]
Scissors
Hot glue
Necklace chain


crochet 5 squares with crochet thread - 3 black ones, and 2 white ones.


Line the squares into a "V" shape, and tie the corners of the squares together to secure them:


Flip the "V" upside down, and hot glue a chain to the back:


Pair with your favorite black and white blouse:


Source: http://www.mandipidy.com/2011/03/yarn-it-all-tutorial-10-granny-square.html

Thursday, November 10, 2011

Cute Christmas Hair Clip

Cute Christmas Hair Clip


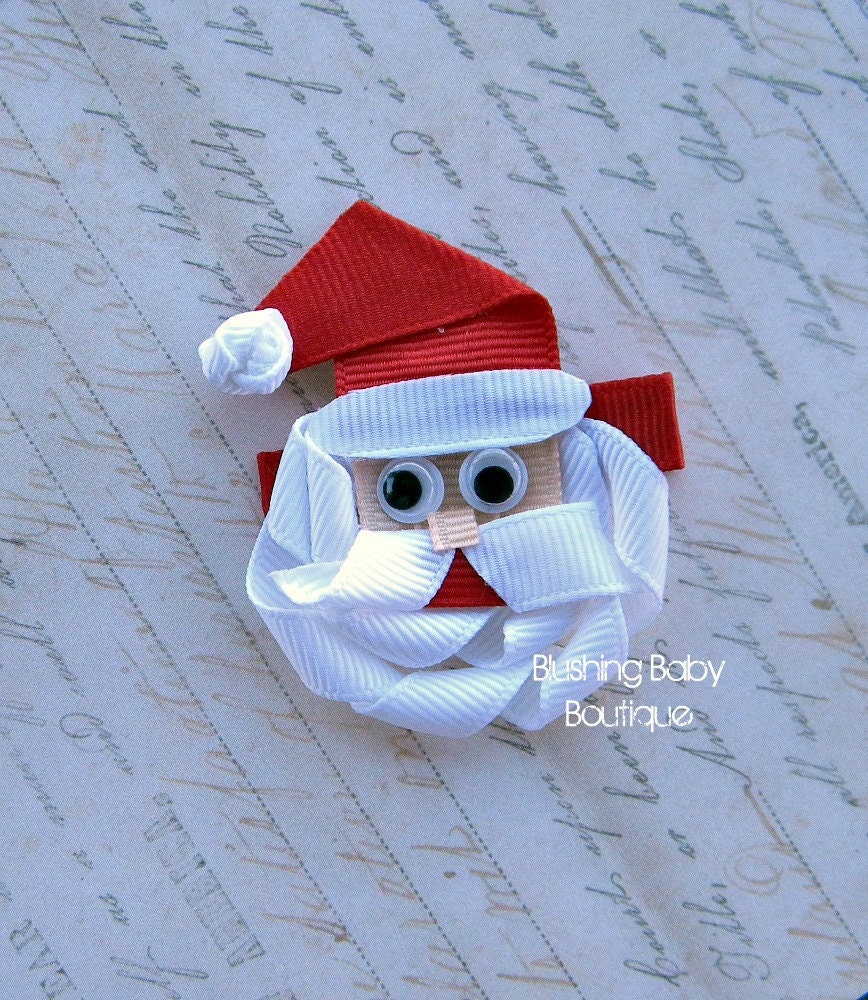
Santa Clause Hair Clip- Attached to Partially lined Alligator Clip-
From blushingbaby
Santa Clause Hair Clip- Attached to Partially lined Alligator Clip-
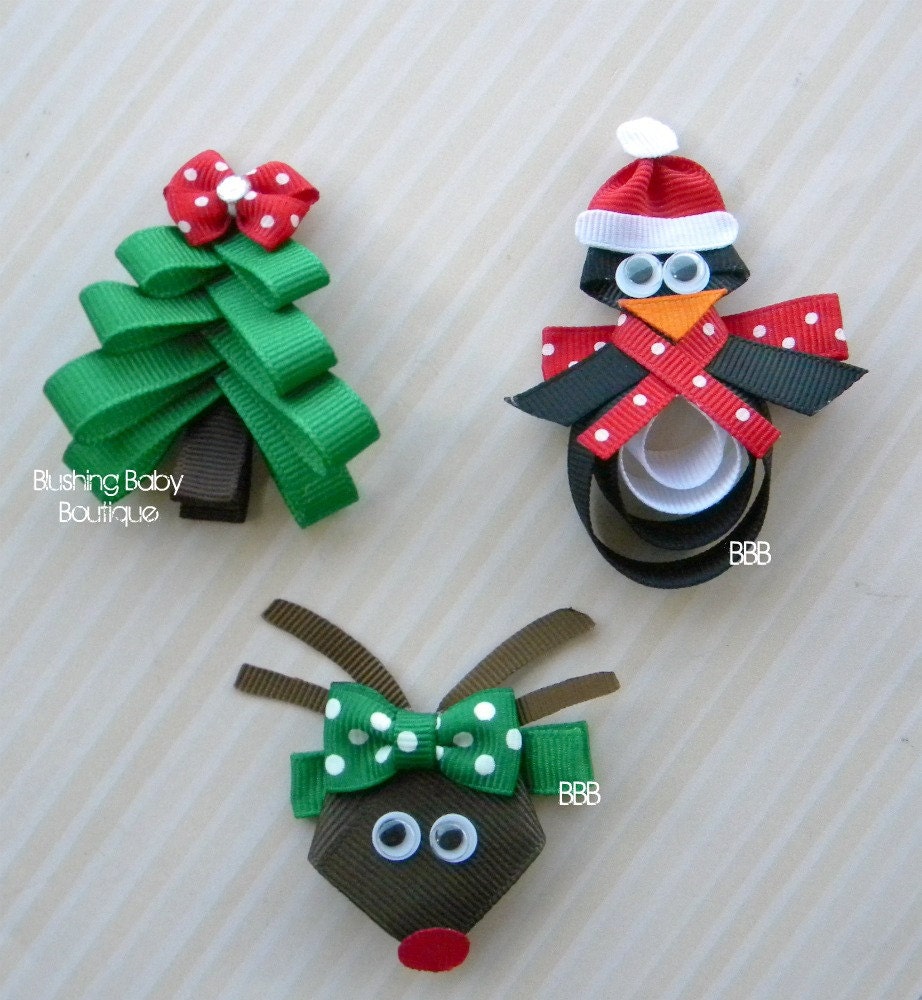
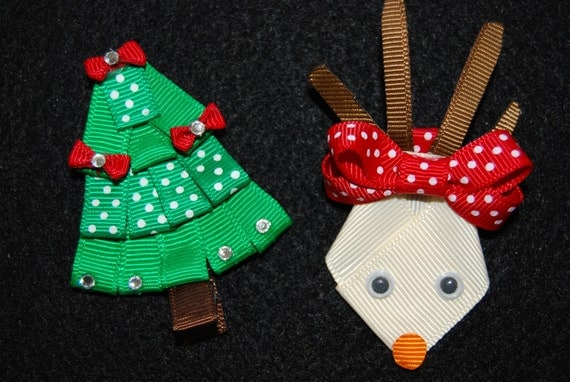
Christmas Trio- Set of 3 Christmas Hair Clips- O Christmas Tree- Paulie the Penguin- Santa's Little Reindeer
From blushingbaby
Christmas Trio- Set of 3 Christmas Hair Clips- O Christmas Tree- Paulie the Penguin- Santa's Little Reindeer
Christmas Trio- Set of 3 Christmas Hair Clips- O Christmas Tree- Paulie the Penguin- Santa's Little ReindeerFrom blushingbaby
Christmas Trio- Set of 3 Christmas Hair Clips- O Christmas Tree- Paulie the Penguin- Santa's Little Reindeer

This listing is for THREE (3) Holiday Hair Clips. You will receive the following by purchasing this listing:
-ONE 2" O Christmas Tree
-ONE 2.5" Paulie the Penguin
-ONE 2" Santa's Little Reindeer
All three of these clips are attached to partially lined alligator clips. They are made of grosgrain ribbon and will be a perfect addition to all holiday outfits.
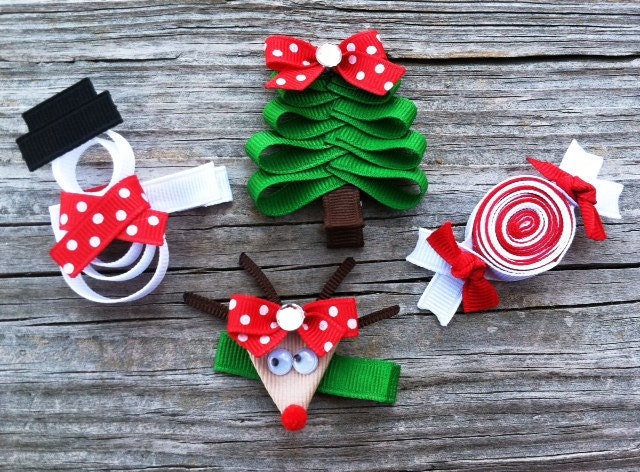
Set of 4.. Christmas Sculpture Hair Clip Set - Holiday Christmas Tree, Reindeer, Snowman, and Peppermint Candy - Free Shipping PromoFrom leilei1202
Set of 4.. Christmas Sculpture Hair Clip Set - Holiday Christmas Tree, Reindeer, Snowman, and Peppermint Candy - Free Shipping Promo
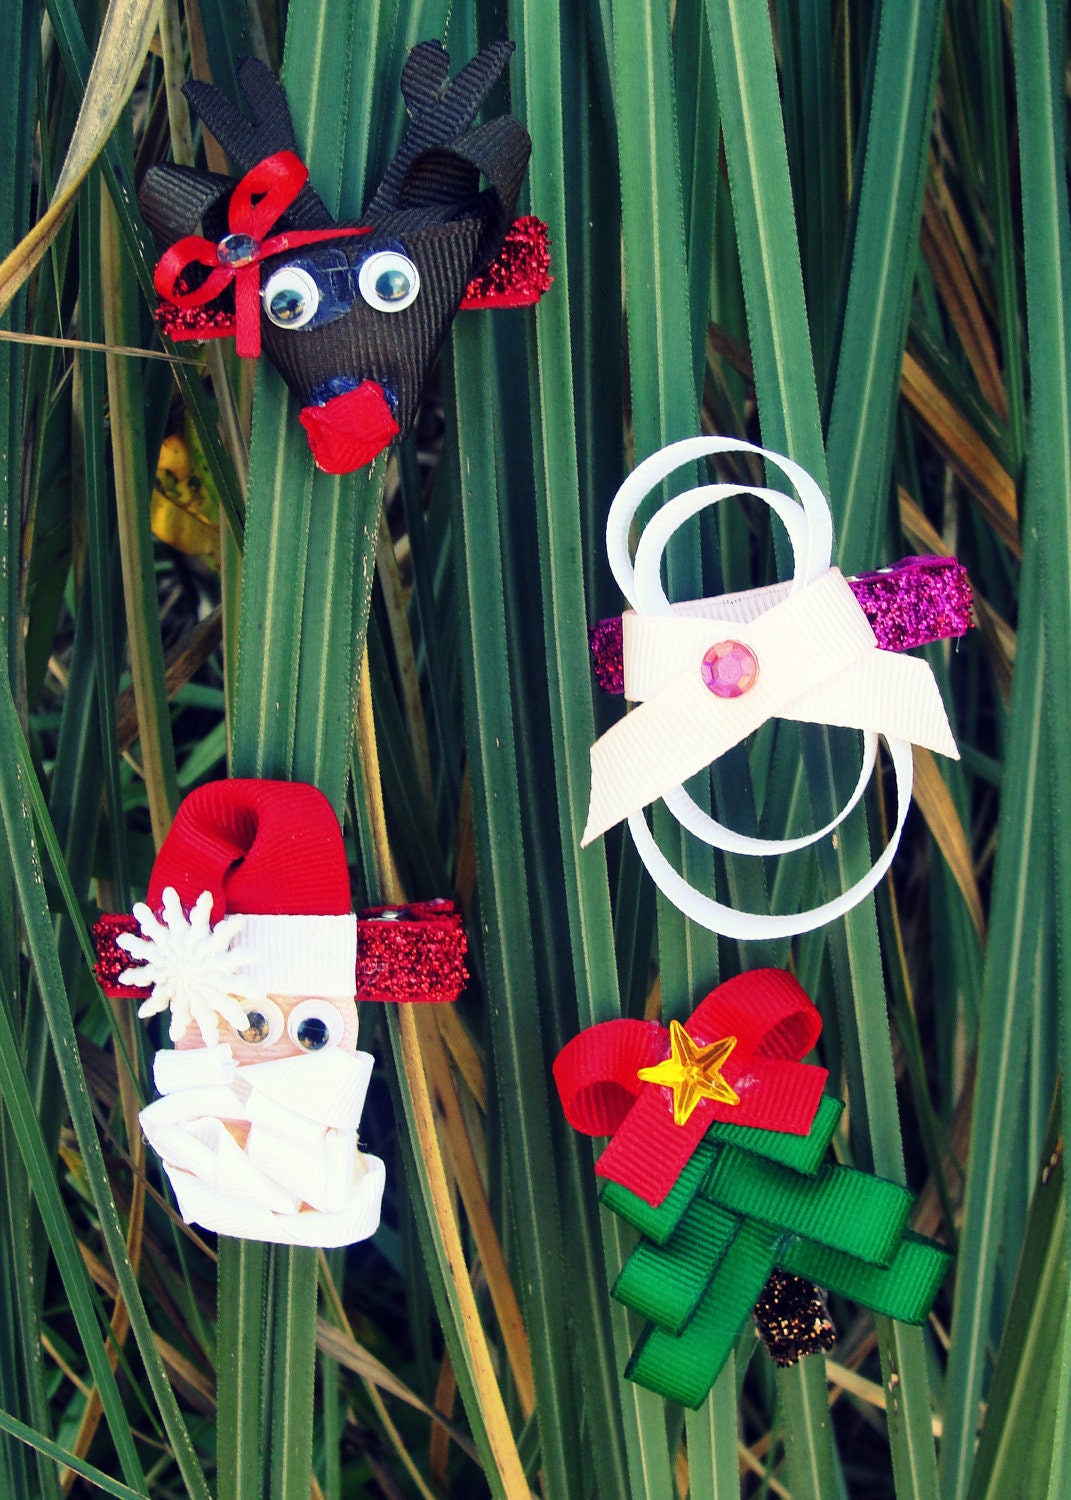
Set of 4 Christmas Sculpted Hair Clip Set-Reindeer, Snowman, Santa Clause and Christmas Tree
From kmostrander
Set of 4 Christmas Sculpted  Hair Clip Set-Reindeer, Snowman, Santa Clause and Christmas Tree

Hand sculpted Christmas hair clips. This listing includes rudolph, a girl snowman, santa clause and a Christmas tree. All on a half lined two prong alligator clip. Perfect for any and every outfit for the Christmas season.
Christmas Tree Rudolph the Red Nosed Reindeer Hair Clip Barrette great Stocking Stuffer AccessoryFrom LePetiteBirdie
Christmas Tree Rudolph the Red Nosed Reindeer Hair Clip Barrette great Stocking Stuffer Accessory

Wednesday, November 9, 2011

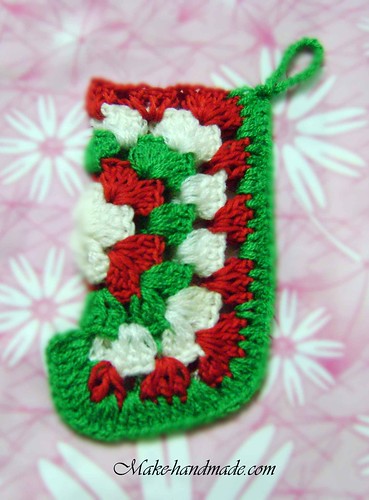
Crochet Christmas stocking, free crochet patterns

http://farm7.static.flickr.com/6041/6329071362_b2a92da521.jpg

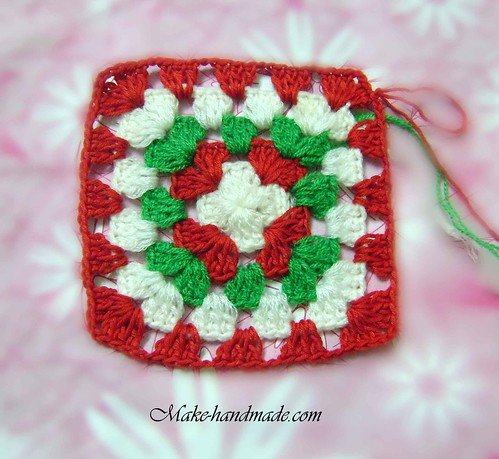
Granny Square Pattern: Crochet Christmas stocking tutorial

http://farm7.static.flickr.com/6092/6329071012_d26bae5fa4.jpg

http://farm7.static.flickr.com/6049/6329071498_4454d8e94c.jpg
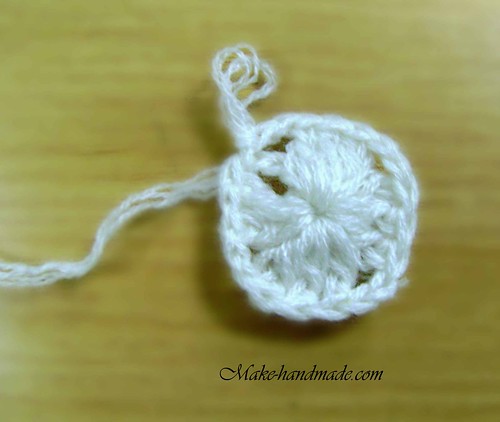
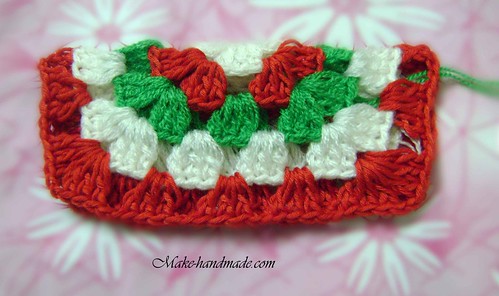
 Round 1 and 2: using white yarn. Ch 4; join into a ring with a slip stitch.
 (3 dc into center of ring, ch 1) 3 times; 2 dc into center of ring; join to third chain of beginning chain with a slip stitch.
http://farm7.static.flickr.com/6240/6328315809_fefcd3238c.jpg
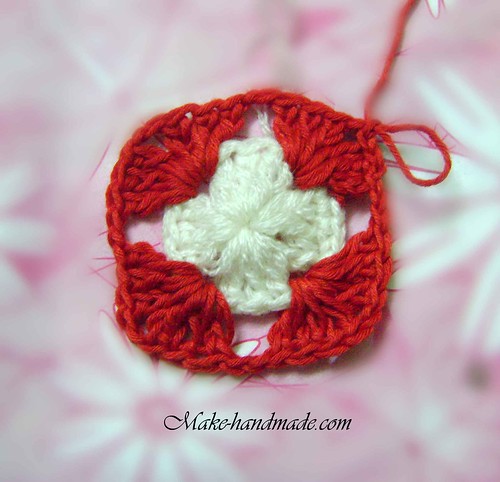
 Round 3: Using red yarn, Ch 3, work corner (dc2, ch1, dc3) into the same stitch, work remaining corners: *ch1, skip over the 3 dc from the previous round, (dc3, ch1, dc3) into the same stitch; repeat from * two more times, ch1, join to third chain of beginning chain with a slip stitch.
http://farm7.static.flickr.com/6091/6328315913_2ff83511cf.jpg
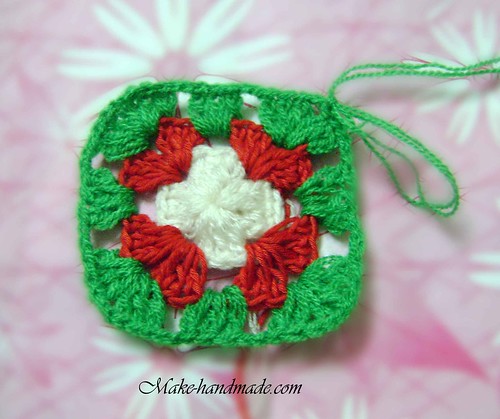
 Round 4: Using green yarn, Ch 3,  work corner (dc2, ch1, dc3) into the same stitch, work remaining sides:* ch1, skip over the 3 dc from the previous round, dc3, ch1, work corner (dc3, ch1, dc3); repeat from * two more times, ch1, join to third chain of beginning chain with a slip stitch.

http://farm7.static.flickr.com/6215/6329070868_c2244f65fa.jpg
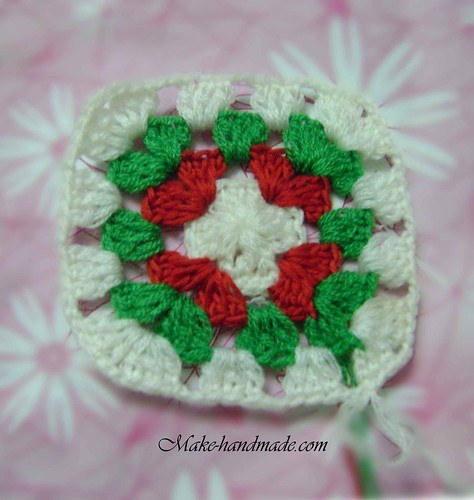
 Round 5: using white yarn, Ch 3,  work corner (dc2, ch1, dc3) into the same stitch, work remaining sides: *ch1, skip over the 3 dc from the previous round, dc3, ch1, skip over the 3 dc from previous round, dc3, ch1, work corner (dc3, ch1, dc3); repeat from * two more times, ch1, join to third chain of beginning chain with a slip stitch.
http://farm7.static.flickr.com/6092/6329071012_d26bae5fa4.jpg
 Round 6: Using red yarn, Ch 3,  work corner (dc2, ch1, dc3) into the same stitch, work remaining sides:* ch1, skip over the 3 dc from the previous round, dc3, ch1, work corner (dc3, ch1, dc3); repeat from * two more times, ch1, join to third chain of beginning chain with a slip stitch.

http://farm7.static.flickr.com/6041/6328316397_efa76f680e.jpg
 Round 7: Folding square in half, Using green yarn, join to boder to creat a stocking. Ch 20, join into a ring with a slip stitch, (ch 3, dc1, dc1, dc1, dc2) 8 times, ch3, tie off.
http://farm7.static.flickr.com/6041/6329071362_b2a92da521.jpg
Happy Christmas!
Source: Make handmade

Tuesday, November 8, 2011

Macrame dragonfly tutorial

http://th05.deviantart.net/fs11/PRE/i/2006/207/8/9/Dragonfly_knot_by_MrJin.jpg

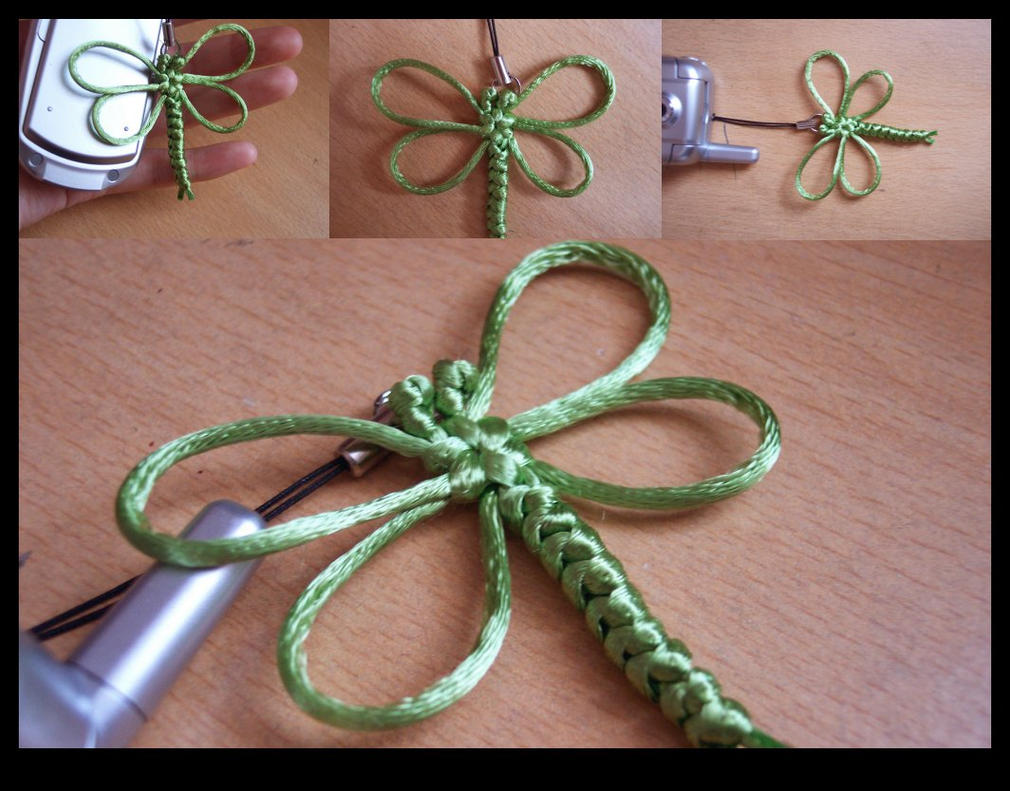
Tutorial: Chinese Knot Dragonflies


macrame dragonfly tutorial
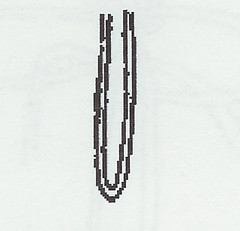
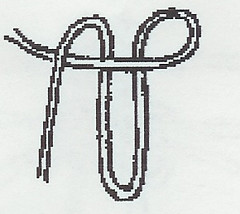
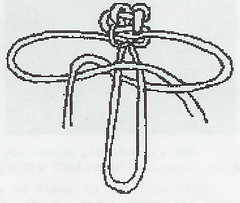
1. Double the cord to make two equal lengths


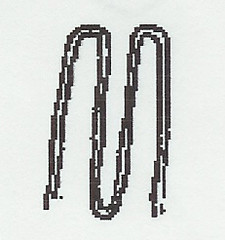
2. Let the ends fall as shown leaving the center loop be the length of the dragon fly that you are making. This is the length of the body. Here is where you can add beads for eyes. They go on at the top of the “M”


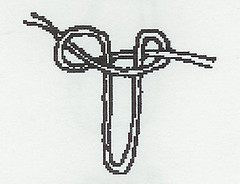
3. Bring the right leg over and under as shown.


4. Bring the left leg behind the body and through the loop as shown.


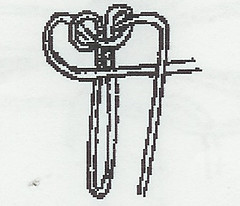
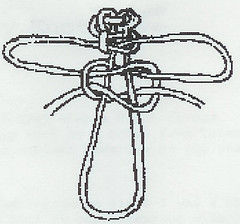
5. This repeats step 3 in the reverse direction


6. This repeats step 4 in the reverse direction. A complete square knot is formed. You may choose to do one or two complete square knots to form the head of the dragonfly.


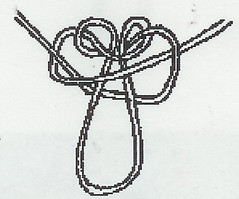
7. The first wing pair is formed as in step three. Allow enough length to produce proper wing to body proportion.


8. Complete the square knot as in step 4. Take care in tightening the knot to allow the wing lengths to stay equal. Tighten carefully and slide the knot up the body loop to the desired position.


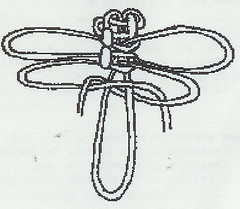
9. Add a second wing set as in step 7 and step 8. Tighten the second wing set and move to position. The body is then completed by square knotting as in steps 3 through 6 above, down the length of the body loop.
10. Tighten carefully as you go. Ending can be completed by trimming loose ends and applying a dot of glue to secure.


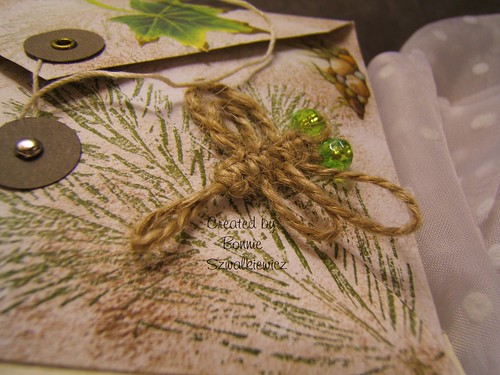
and the finished dragonfly:
2009-01-14 010

 Read more: http://craftiblog.wordpress.com/2006/04/22/macrame-dragonfly-1/

Crochet sexy laced up leg

Crochet Cream Sexy Laced Up Leg Warmers
photo

Crochet Wavy Black Barefoot Sandals
photo
Crochet Butterfly BLUE Barefoot Sandals
photo
Crochet Lilac Barefoot Sandals

photo
photo
Crochet Turquoise Barefoot Sandals
photo
Crochet Butterfly CREAME Barefoot Sandals, Nude shoes, Foot jewelry, Wedding, Victorian Lace, Sexy, Lolita, Yoga, Anklet , Steampunk
photo
Crochet Khaki Barefoot Sandals
photo
Crochet Butterfly LAVENDER Barefoot Sandals
photo
Crochet Beige Barefoot Sandals
photo
Crochet Butterfly Silver Metallic Barefoot Sandals
photo
Beige Crochet Lace Gloves, Fingerless.

photoCrochet with beads Creame Barefoot Sandals, Nude shoes, Foot jewelry, Wedding, Victorian Lace, Sexy, Yoga, Steampunk, Beach Pool
photophoto

Crochet Cream Barefoot Sandals, Nude shoes, Wedding, Victorian Lace, Sexy, Yoga, Anklet , Steampunk sandals, Beach Pool, Natural Stone


photo
Wedding White Crochet Flower Barefoot Sandals http://www.flickr.com/photos/handmadevikulya

Related Posts Plugin for WordPress, Blogger...